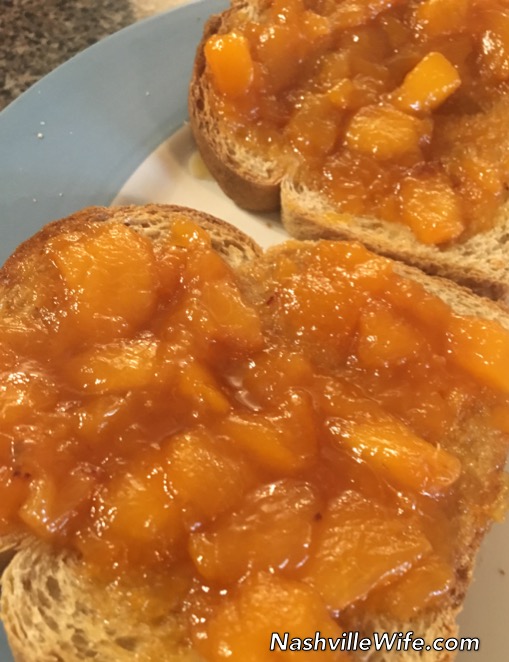
Mr. Handsome and I are celebrating the new week with our fresh batch of homemade peach jam (on homemade bread, of course). Would you like to celebrate with us?
This year, we were so busy with moving and our trip to Canada that we hardly had time to eat any peaches. How sad is that?
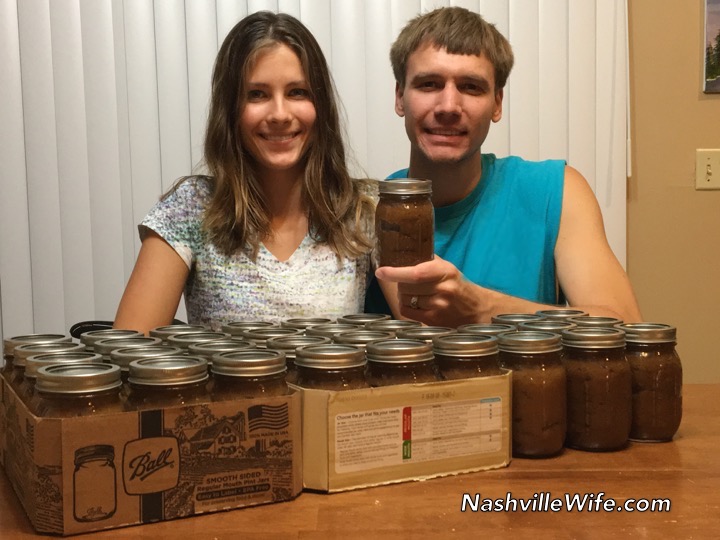
Well, just last week, my in-laws got their hands on a few bushels and graciously shared some with us. Last year, I canned peaches (click here to view my tutorial), so this year I decided to do something a bit different…homemade preach preserves. (We ate about two dozen fresh peaches before canning the rest.) My recipe follows the old-fashioned method that does not require pectin.
Ingredients:
10 cups diced peaches (skin and pits removed)*
3 cups granulated sugar
1/3 cup fresh lemon juice
Pint or half-pint jars
*As a general rule of thumb: 1 pound of fresh peaches=3-4 medium peaches=approximately 2 cups sliced peaches
Directions:
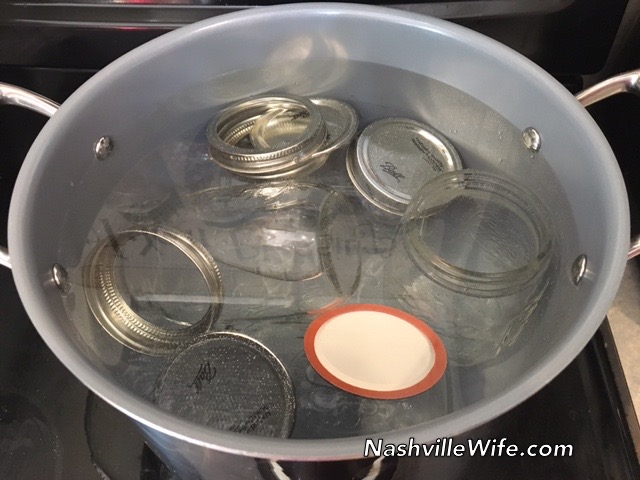
Step 1: Put a large pot of water on the stove to simmer. This will be your water bath for canning, so make sure the pot is large enough to allow the cans to be completely immersed, with 2 inches of water above the lids.
Add as many jars, lids, and rims as will fit in the pot at one time
(with jars standing up). I added four. In order to fully sanitize, make
sure the water is simmering for 15 minutes. When finished sanitizing, turn off burner, but leave jars in hot water until ready to use. Side note: For extra sanitation, I run jars and rims (not lids) through the dishwasher before placing in simmering water bath.
Here is a note from the Ball/Kerr website
on sanitizing your canning lids: “Our Quality Assurance Team performed
comprehensive testing to determine the need for pre-heating lids.
Ultimately, we determined that it’s completely safe to skip pre-warming
lids in the canning process. While it’s still safe to simmer your lids
before use, you should never boil them. Our recommendation for over 40
years has always been to simmer (180°F) – not boil (212°F) – the lids.”

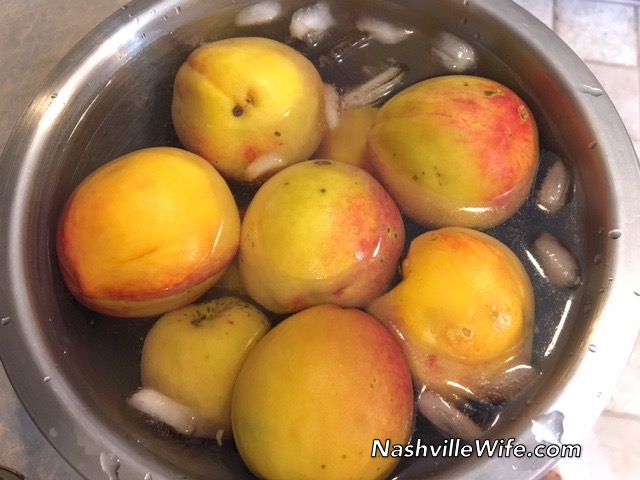
Step 2: Load your peaches into the sink, and rinse.

Step 3: Fill a medium-sized pot with water, and bring to a boil. Turn
heat down to medium, add several peaches, and cook for 1 minute. If the
water begins to boil, turn the heat down. Meanwhile, prepare a
medium-sized bowl of ice water.

Step 4: After peaches have been in the hot water for 1 minute, transfer peaches to ice water for 1 minute and 30 seconds.
Step 5: Remove peaches from ice water, and gently remove skin with your
hands. If your peaches are well-ripened, the skin should come off
easily. If it doesn’t, let peaches soak in the hot water bath for
another 30 seconds and then in the ice water for another minute.

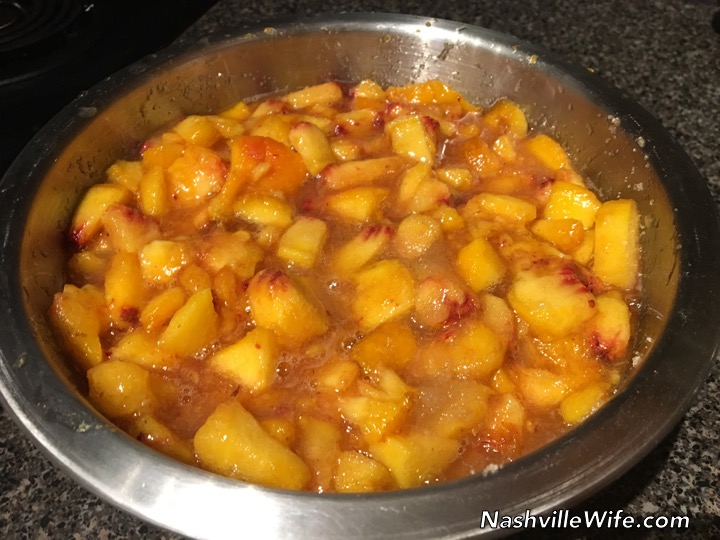
Step 6: Dice peaches (removing pits), and add to a large mixing bowl. Per 10 cups of diced peaches, add 3 cups granulated sugar and 1/3 cup fresh lemon juice. Mix well with a wooden spoon. If time allows, cover the bowl of peaches, and leave it to sit at room temperature for an hour to enhance the flavor. If time does not allow, continue to the next step.
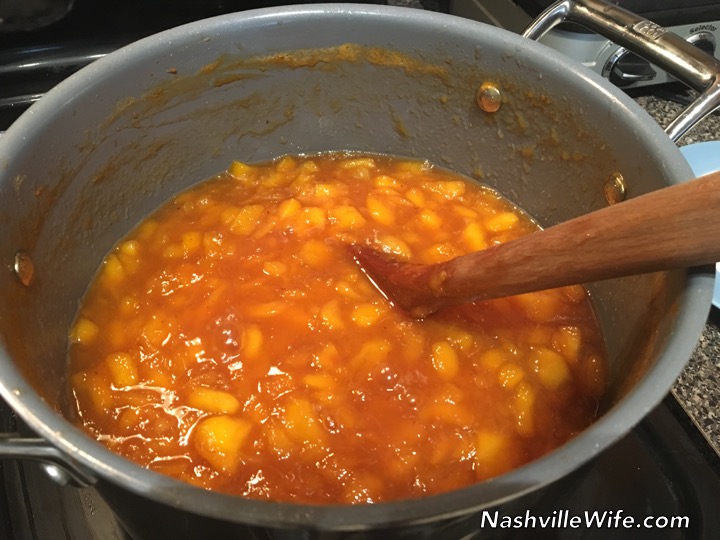
Step 7: Transfer peach mixture to a medium-sized saucepan. Bring to a boil over medium heat, stirring frequently. Use the back of the wooden spoon to mash peaches against the side of the pan as they cook.

When peaches start to boil, begin stirring constantly. Continue stirring over medium heat until peaches cook down and reach jam consistency (25-50 minutes). To determine if jam is ready, place a small amount on a cold plate, and place the plate in the freezer for a few minutes. If it gels, the mixture is ready.
When peaches reach jelly consistency, remove empty jars, lids, and rims from hot water, and set on a towel. Fill jars with hot jam, leaving about 1/4 inch of space at the top. To release air pockets, run a butter knife or wooden skewer around the sides and through the middle of the jars.

Wipe rims of jars with a clean cloth, and place lids on each. Screw rims
on firmly (not too tight). Now it’s time to process your jam. Using
your tongs, place jars in your makeshift water bath canner. (Jars should not
touch each other.) The water level should be 2 inches above the lids.
Bring water to a boil, and boil 10 minutes (half-pint or pint-sized jars). If you live at an altitude above 6,000 feet, the National Center for Home Food Preservation recommends processing for an additional five minutes.
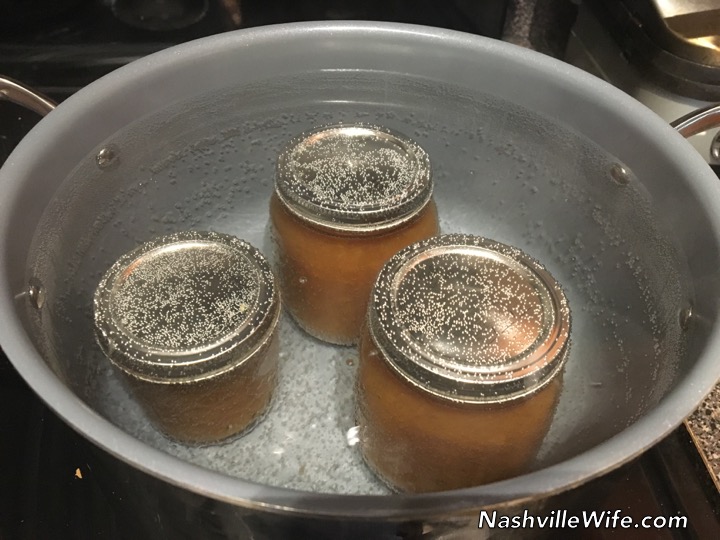
Use tongs to remove jars, and place undisturbed on a towel for 24 hours. (Make sure jars don’t touch each other.)
Lids should seal within 30 minutes. To check if they have sealed, press
down on each lid. If they don’t bounce back, they are sealed properly.
Jars that don’t seal within 24 hours should be refrigerated and eaten promptly. Enjoy!